


 2 comments
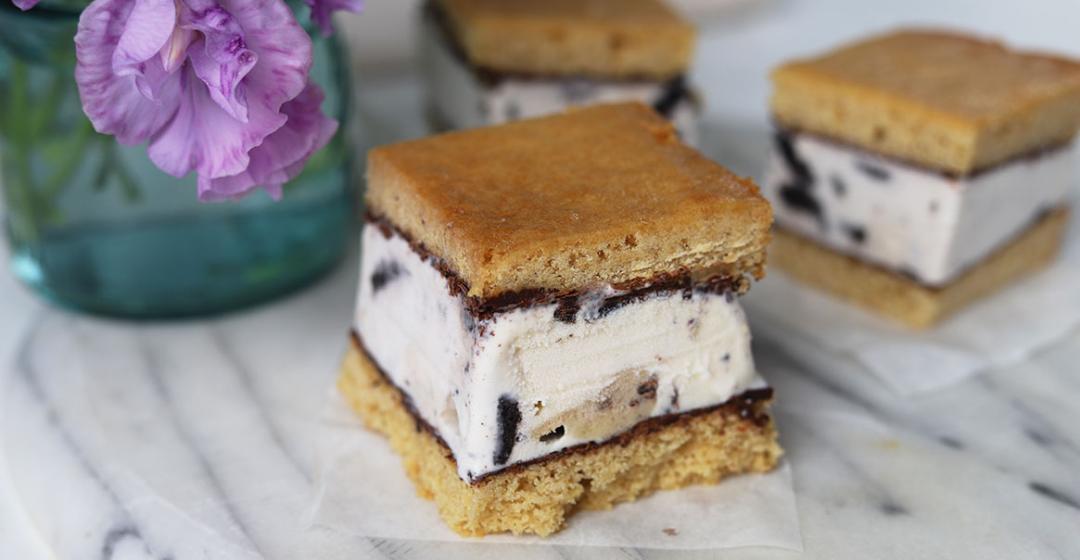
This is the most fun and delicious ice cream treat you will make all summer. The process is easy – the cookie layer is a whiz to make – and you can use store-bought ice cream. Do plan ahead as you will need to build in freezing time before serving. And the one ingredient you will want to add to your pantry if you haven’t already is Lyle’s Golden Cane Syrup. It’s the secret to making a cookie that’s tender enough to bite through. (Corn syrup can be substituted).
If you like, you can leave out the chocolate layer, but it adds a lovely crunch and it’s as simple as spreading some melted chocolate on the cookie. You can cut the finished sandwiches to any size you like, but be aware that everyone will want seconds…and thirds. Before you start, read all the Kitchen Notes, which are at the end of the recipe and also in Baking Together #35: Making Irresistible Ice Cream Sandwiches.
Makes 12 to 16 sandwiches
For the cookie
1 1/3 cups (6 ounces) all-purpose flour
1/4 teaspoon baking soda
Pinch of table salt
4 ounces unsalted butter, cut into four pieces
1/2 cup (3 1/2 ounces) firmly packed light brown sugar
2 tablespoons (42 grams) Lyle’s golden cane syrup or light corn syrup
1 teaspoon pure vanilla extract
1 large egg
For the chocolate layer
4 ounces bitter, semi or white chocolate, melted
For the ice cream
2 containers (14 ounces each) ice cream in paper containers
Make the cookie layer
1. Position a rack in the center of the oven and heat the oven to 325°F. Line the bottom and sides of a 9 x 13-inch pan (preferably straight-sided) with foil and lightly grease.
2. Arrange a small cookie sheet (I use a quarter sheet pan) in the freezer until very cold or up to one day before assembling the sandwiches.
3. Put the flour, baking soda and salt in a small bowl and whisk until blended.
4. Put the butter in a medium-sized saucepan. Cook, stirring, over medium-low heat until melted. Slide the pan from the heat and whisk in the brown sugar, cane syrup, and vanilla. Cool slightly.
5. Add the egg and whisk until well blended. Add the flour mixture and, using a rubber spatula, stir until well blended. Pour into the prepared pan and, using a small offset spatula, spread the batter into an even layer.
6. Bake until the edges are slightly darker brown and the top springs back when lightly pressed, 16 to 18 minutes. (Do not overbake or the cookie layer will be too crisp). The top will look shiny and moist. Transfer the pan to a rack and cool completely.
Assemble the sandwiches
1. When the cookie layer is cool, invert the cookie layer onto a cutting board and peel away the foil. The topside will be down.
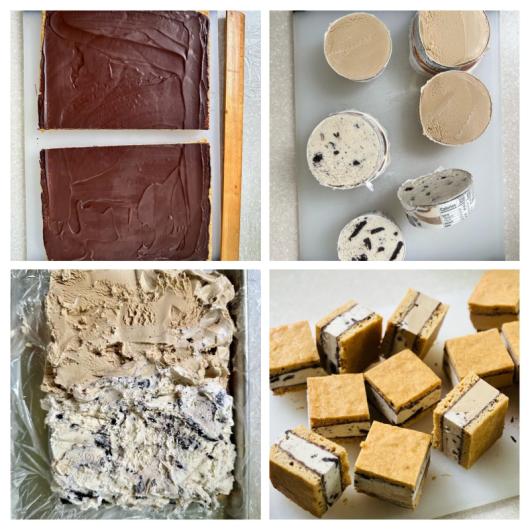
2. Using an offset spatula, spread the melted chocolate evenly over the surface getting as close to the edges as possible. Slide the cutting board into the fridge and chill until the chocolate is set, about 1 hour, before assembling.
3. Remove the cutting board from the fridge and cut the cookie layer crosswise into two equal pieces.
4. Put the ice cream containers on a cutting board and set aside until slightly softened, about 5 minutes.
5. Arrange the chilled cookie sheet on the counter and line with one or two large pieces of plastic wrap.
6. Remove the lids and any coverings and set the ice cream containers on their sides. Using a large sharp knife (I use serrated), cut each pint into four slices. Try to keep the slices a similar thickness. Working quickly, snip and peel away the wrappers and arrange some of the rounds on one cookie layer. Using the remaining rounds, cut and fill any gaps around the rounds to cover. Using a metal spatula, spread into as even a layer as possible. (Don’t fuss too much - it’s never going to be perfect). Position the remaining cookie layer, top side up, over the ice cream, aligning the edges. Press gently but firmly. Using the metal spatula, smooth the edges and press in ice cream as necessary.
7. Wrap the plastic tightly over the filled layers and slide the cookie sheet into the freezer. Freeze until very hard, about 4 hours or up to 1 month.
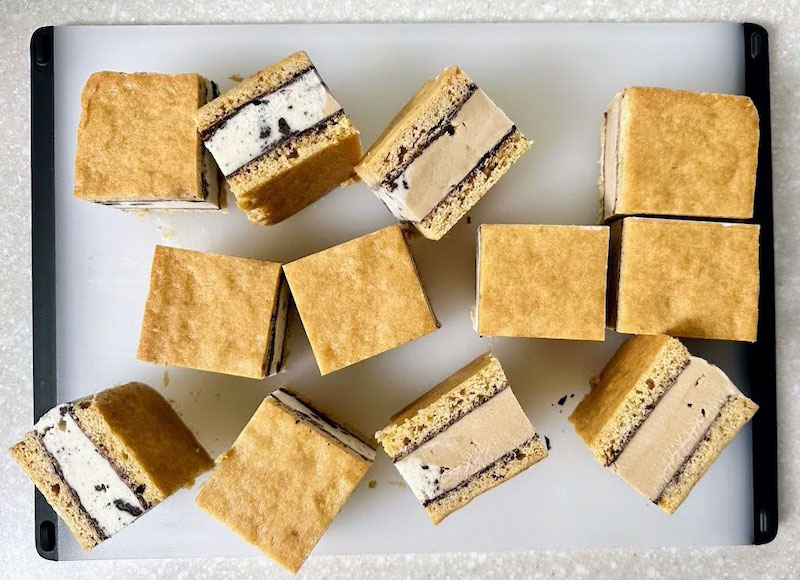
8. To cut into serving pieces, unwrap and place the ice cream block on a cutting board. Using a large, serrated knife and a sawing motion, divide in half crosswise by cutting through top cookie layer then firmly pressing down through the ice cream and bottom cookie layer. Working with one half at a time (keep the other half in the freezer), cut into smaller pieces. I do 6 to 8 squares per half depending on the crowd. Serve immediately or wrap individually and return to the freezer until ready to serve or up to three months.
Kitchen Notes
The Right Texture for the Cookie Layer
The success of the cookie layer relies on it being sturdy enough to handle the thick layer of ice cream (yum) yet soft and pliable to bite into it without the ice cream squishing out the sides and back (disappointing). The not-so-secret weapon to accomplish this goal is the Lyle’s Golden syrup (or the corn syrup) so don’t be tempted to leave it out.
Plan Ahead
Be sure to plan ahead as the assembled sandwiches need some freezer time to firm up before cutting and serving.
Two Ice Cream Flavors Is Better Than One
To give my family and friends options, I use two flavors of ice cream and arrange them side by side when assembling. Some folks go for one flavor, some reach for the other, and some lucky folks get a combo of both ice creams. Everyone’s a winner. My family likes coffee and cookies 'n' cream, but whatever flavors work for you!
Optional Homemade Ice Cream
If you want to use home-made ice cream (I recommend my No Churn Malted Vanilla Ice Cream), follow the recipe and line the loaf pan with plastic before adding the ice cream to make unmolding easy. Lightly coat the bottom and sides of the pan with oil, arrange two sheets of plastic wrap in a cross pattern over the pan and press into the bottom and up the sides of the pan to cover. Let the excess hang over the sides.
When ready to assemble the sandwiches, invert the ice cream block onto a cutting board using the plastic to help release it from the pan. Peel away the plastic, cut crosswise into six slices and continue as directed.
Keep It Cold
Using a well-chilled cookie sheet will help the ice cream stay chilled during assembly.
Nutty Sandwiches
Scatter 1/2 cup (2 ounces) finely chopped walnuts or pecans over the top of the batter before baking. It might be tempting to add sprinkles or mini chips instead of the nuts, but I don’t recommend it: when you pick up the sandwich to eat it, the chocolate chips will melt in your hands and make for a messy treat. Plus you’ve got that chocolate layer for the crunchy chocolate thing!
Time to Soften Ice Cream Varies
Depending on where you live, what season it is, how warm/chilly you keep your home, your freezer temperature (it should be set at 0°F), or what type of ice cream you buy, ice cream warming time will vary from a speedy 5 minutes to as much as 15 minutes.
Make Ahead Tip
The cookie layer can be made up to 1 day ahead or frozen up to 1 month before proceeding with the recipe.


Comments (2)