


 2 comments
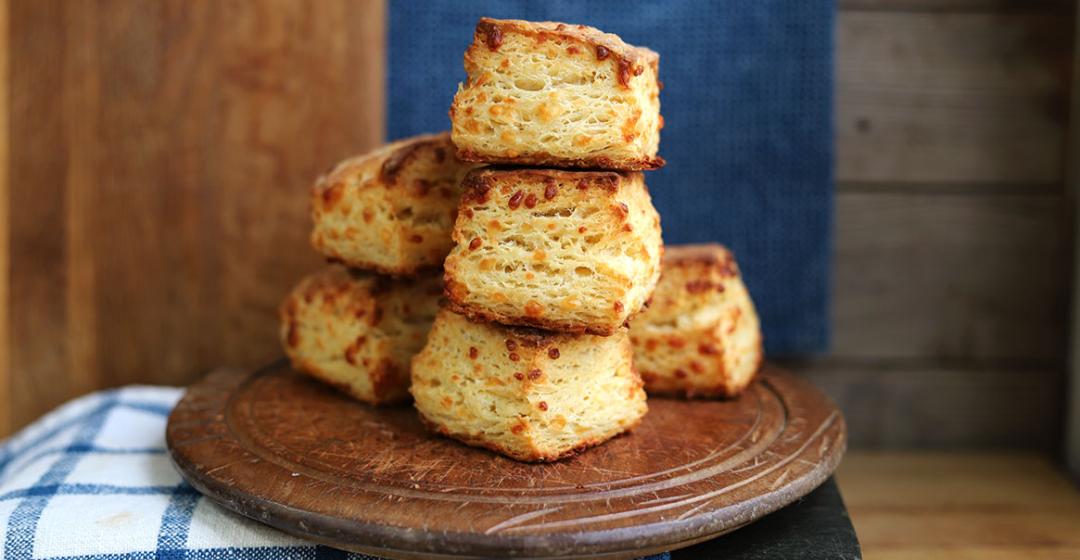
These lofty, multi-layered cheese-studded biscuits are both impressive and irresistible — a great reward for taking just a few extra steps beyond what you would ordinarily do to make a biscuit. Be absolutely sure to read the tips in Baking Together #17: Cheesy Biscuits Squared before making the recipe.
Makes 6 biscuits
- 7 tablespoons (3 1/2 ounces) unsalted butter, in one piece and well chilled
- 3 ounces Cheddar cheese (about 2/3 cup, if using pre-shredded cheese)
- 2/3 cup (5 5/8 ounces) buttermilk, cold
- 1 tablespoon Dijon mustard
- 1 teaspoon hot sauce (optional)
- 1 1/3 cup (6 ounces) unbleached all-purpose flour
- 3/4 cup (3 ounces) cake flour, sifted
- 3 tablespoons ground Parmigiano Reggiano
- 2 1/4 teaspoons baking powder
- 1 teaspoon table salt
- 1/4 teaspoon baking soda
1. Read Baking Together #17 before starting.
2. Line a small cookie sheet or quarter sheet pan with plastic wrap. Using the wrapper to hold the end of the butter stick, grate it over the plastic using the large holes of a box or handheld grater. Grate the cheese, if necessary, and sprinkle the grated cheese over the butter. Slide the pan into the freezer.
3. Position a rack in the center of the oven and heat the oven to 425°F. Line a cookie sheet with parchment or a nonstick liner. Whisk the buttermilk, mustard and hot sauce, if using, in the measuring cup until well blended.
3. Whisk the all-purpose and cake flours, parmesan cheese, baking powder, salt and baking soda in a medium bowl until well blended. Remove the sheet pan of butter and cheese from the freezer. Lift up the plastic wrap (along with the butter-cheese mixture), scatter the mixture over the flour and, using a rubber spatula, toss until coated. Pour the buttermilk mixture over the flour and stir and fold until it forms a shaggy, moist dough. Using the spatula with one hand and using the fingers of your other hand is the best way to work the dough as little as possible.
4. Scrape the dough and any remaining floury bits onto the counter and gently press the clumps into a 6-inch square. Roll the sticky and crumbly dough into a 14 x 6-inch rectangle (the dough will be very ragged and craggy) dusting with a little flour if absolutely necessary (it will be quite sticky). With a short side facing you, use a bench scraper to fold the top one-third of the dough toward the middle and fold the bottom third over the two layers to make a rectangular. (Like you are folding a letter.) Turn the dough so that the seam is on the right. Repeat the rolling and folding two more times. Gently press (using light pressure with the rolling pin if necessary) and shape the dough into a 5 x 6 1/2 – inch rectangle.
5. Using a very sharp knife (a thin blade is a bonus) and a downward motion, cut away the edges to make a straight-sided 4 x 6-inch rectangle. Make sure to cut straight down, because a sawing motion will pinch together the sides and inhibit rising. Cut the square (again cutting straight down) into six equal pieces. Arrange the biscuits upside down (this helps release any sealed edges and will enhance the rise) about 2 inches apart on the prepared cookie sheet.
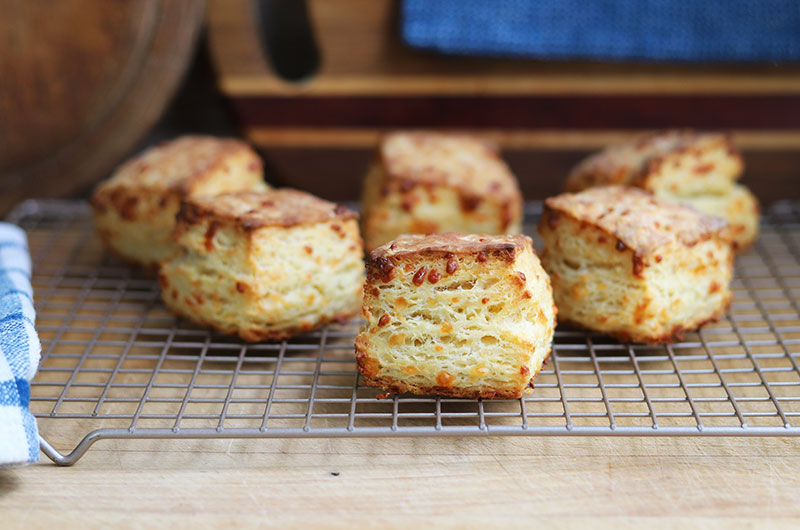
6. Bake until the tops and edges are well browned, 21 to 23 minutes. Move the sheet to a rack and let cool until warm enough to handle, about 10 minutes. Serve immediately or let cool completely, cover and stow at room temperature for up to 2 days. Leftovers are delicious when reheated in the oven or toaster oven.
Tip: Bake the trimmings into croutons.


Comments (2)