


All summer long, I savor the bounty of my home garden: tasty tomatoes, flavorful cucumbers, and crisp green beans. I get tired of going cold turkey all winter long, when I have to resort to buying supermarket produce of dubious quality and with little to no flavor. So my goal for 2011 – or one of them – is to preserve some food from the garden that I can enjoy in the off months.
I envision neat rows of stewed tomatoes and pizza sauce bursting with that summer tomato flavor to liven up my soups and stews, or to make it easy to whip up a few homemade pizzas. There could be a thick strawberry sauce or a chunky Island peach chutney to accompany pork tenderloin or a chicken cutlet. When what to serve for dinner eludes me, I could reach into my preserve collection and come up with a quality meal.
But it would be little more than a daydream without learning how it’s actually done. And then doing it.
So I asked around to find a few people on the Island with an expertise in canning. Lynn Irons’s name came up. She writes the gardening column for the Vineyard Gazette and describes herself as one of the few “dinosaurs” still practicing the underutilized culinary art of canning. Another person often recommended to offer canning tips is Alice Robinson. And with good reason, I learned. Alice regularly puts up tomato sauce, blueberry jam, and relish from cucumbers and peppers that her husband, Tom, grows in their backyard garden in Vineyard Haven. She also has a degree in home economics and has been teaching the ServSafe restaurant safety class for chefs and caterers for many years.
Alice gave me a quick tour of the history of canning. Since the 1880s when glass jars were first manufactured, canning has experienced cycles of popularity and decline. It thrived in the years of rural America, when many people lived on farms, throughout the Depression, and during World War II. Following the war, when more women began working outside the home and innovations such as frozen foods became increasingly popular, home canning fell off. It regained a modicum of popularity during the seventies’ back-to-the-land movement and again in the eighties’ renaissance of home- and artisan-based businesses, before falling back into near obscurity.
These days two factors have triggered a renewed interest in this age-old culinary art: the growing popularity of locally grown foodstuffs with more farm stands and home gardens, and the perceived thriftiness of do-it-yourself food preservation.
“We’re sort of back to slow foods and the canning,” says Alice. “I think the economic times makes a difference.”
Home canning lowers our carbon footprint by prolonging the life of our own produce and allowing us to buy less food shipped from across the country and beyond. It also helps us reconnect to the sources of our food, and lets us control what goes into the food we eat, such as preservatives, chemicals, salt, and sugar.
Still, to the uninitiated, canning can seem a bit intimidating. There’s the fear of making a mistake and not sealing the jars properly, potentially allowing harmful bacteria to thrive within. However, when you’re meticulous about cleanliness and carefully follow step-by-step instructions, the risks are minimal.
Alice uses a boiling-water-bath process, a method she recommends as a good starting point for a beginner. The water-bath process, in which jars are covered with boiling water for a specified period of time, is used to preserve acidic foods such as tomatoes, salsa, and pickles, as well as products that contain sugar, such as jams, preserves, and chutneys.
The water-bath method eliminates the potential for bacteria growth: The heat of canning kills bacteria and the lack of oxygen in the sealed glass jars prevents any new bacteria from growing, explains Alice.
The other method, pressure canning, comes into play for low-acid vegetables such as corn and beets, and for meat or fish. These low-acid foods can be subject to botulism, and only canning in a pressure cooker, which is fitted with a safety valve that traps steam and reaches temperatures up to 240 degrees, can kill toxin-producing spores. “Some people swear by it,” she says. “Most people can do a water bath, but you need determination to do pressure canning.”
Alice advises following recipes from books such as the Ball Blue Book Guide to Preserving or the one on her shelf, Putting Food By. “It’s got everything, even okra – you name it,” she says about the latter book. She sometimes compares one or two recipes, just as many cooks do, for different spices or techniques. Another book, Saving the Seasons: How to Can, Freeze, or Dry Almost Anything, includes inspiring photographs of beautifully preserved produce, not to mention ideas for combinations such as fruit-and-tomato relish or pear-apple chutney.
“You have to follow what the recipe says,” Alice notes, especially when it comes to the correct amount of time to keep the jar in the water bath. “I’d be a little bit cautious of using private sites,” she says of information on the Internet. “You can can on a whim, but it has to be an educated whim.”

She also suggests talking to – and even watching – family members and friends who might have an expertise in canning. “It’s a great way to reconnect with older family members.”
Alice notes that the time you spend canning on a particular day can yield results you can use for months. “It gives you a sense of accomplishment” seeing jars lined up and at the ready for a meal. And even if you can’t envision doing it more than once, she adds, “You might be more willing to support a local artisan if you really know what it takes to create whatever the product is.”
Canning basics
What you need
You can find canning supplies in many kitchen and hardware stores, such as LeRoux at Home and Shirley’s Hardware in Vineyard Haven or Granite Hardware in Edgartown. Canning jars and lids are often sold at supermarkets. Jarden Home Brands, the current manufacturer of Ball glass canning jars, sells supplies through its website, www.freshpreserving.com.

- Pint- or quart-sized jars for canning
- New lids (if reusing jars)
- Large pot (a lobster pot works nicely)
- Metal jar rack (to lift jars off the bottom of the pot)
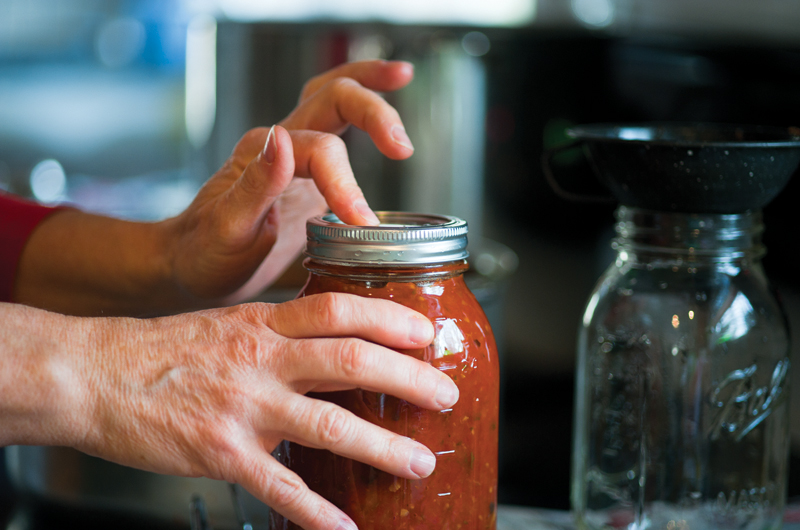
- Jar lifter (see photo above)
- Tongs
- Wide funnel
Canning summer tomatoes, step by step
The boiling-water method, followed below, works best for high-acid garden bounty such as tomatoes, fruits such as peaches or strawberries, and anything pickled using vinegar. Note: Certain varieties of tomatoes are lower in acid. Check online for information on the variety you are using. If in doubt, or to be sure your canned product has a low enough pH to be safe, experts recommend adding 1/2 teaspoon citric acid or 2 tablespoons bottled lemon juice to each quart when canning (fresh lemon juice varies in acidity). Generally tomatoes ripened on the vine during the height of summer are higher in acid. Those ripened at the end of the season when there’s less sunlight are lower in acid.
1. Gather your tomatoes. Read through the recipe. Wipe down kitchen counters with a bleach solution (such as a store-bought sanitizer or a solution of 1 tablespoon of bleach to 1 gallon of hot water), pull back your hair or wear a hat, and wash hands often with soap and water.
2. Wash the canning jars with soap and hot water. The jars can be reused, but the lids and metal bands work only once for sealing, so they should be replaced each time.
3. Fill the canning pot with water, place a jar rack on the bottom, add the jars (they should be completely covered in water), and heat in hot water (not boiling), until ready for use. Remove some of the hot water to a bowl and add the lids and bands. (Lids should not go in boiling water to keep seal intact.)
4. Bring another pot of water to a boil (to loosen and remove tomato skins). Submerge the tomatoes in boiling water for 30 to 60 seconds. Remove, dip into cold water, and drain. Core, and remove the skins.
5. Using a jar lifter, drain the canning jars and place them on a clean towel.
6. Using the wide funnel, pack the tomatoes into the warm canning jars, filling them to about 1/2 inch from the top. Insert a knife or spatula into the tomatoes to remove any air bubbles.
7. Use a clean, damp cloth to wipe the rims of the jars.
8. For each jar, remove a lid from the hot water with the tongs and place it atop the jar. Put the band on and twist until fingertip tight.
9. Using the jar lifter, place the jars filled with tomatoes back into the simmering water atop the jar rack, covering them with at least 1 to 2 inches of water. Then cover the pot with a lid and bring to a gentle boil. Keeping covered, gently boil for 1 hour and 25 minutes.
10. Remove the jars and place on a kitchen towel laid on the counter. Let cool 12 to 24 hours. As the tomatoes cool, they consume oxygen and the lids will pull down to make a tight seal. There should be no flex when you press the center of the lid with your finger.
11. The next day, label and date the canned tomatoes, and store in a cool, dark place.
The following canning recipes were originally published along with this article: